![]() I just finished reading Walter Isaacson’s remarkable biography of Steve Jobs, which I highly recommend. It’s a great read, and it inspired me to develop this post on how to use Keynote for Macs. Keynote is a program that Steve Jobs demanded his team create for his product unveilings because he was so frustrated with Microsoft’s PowerPoint, which he found useless and would never use.
I just finished reading Walter Isaacson’s remarkable biography of Steve Jobs, which I highly recommend. It’s a great read, and it inspired me to develop this post on how to use Keynote for Macs. Keynote is a program that Steve Jobs demanded his team create for his product unveilings because he was so frustrated with Microsoft’s PowerPoint, which he found useless and would never use.
In my mind, there is simply no question that Keynote is a superior product for many reasons, including: (1) it’s a Mac program, so it’s well integrated with all aspects of the Mac laptops and iPad; (2) it embeds videos in the file itself, unlike PowerPoint, which “links” the videos to the main file—and these links can and do get lost when the file is being copied, often during the stress of trial; (3) Keynote also accepts as video any format that your QuickTime player supports such as MP4 videos, which are better quality than Windows Media; and (4) Keynote also supports very high resolution and much better drawing tools, as well as standard template background designs.
To encourage attorneys to give it a try as an alternative to PowerPoint for presenting your case, I asked Cogent Legal’s associate designer, Anna Reeser, to write the following Keynote tips and tricks. You can purchase the Keynote App for $19.99 from the Apple App Store if you do not already have it. To get started, view a Keynote tutorial on the Apple website, and then try the following steps to create a powerful presentation.
Place & Format of Images & Videos
Keynote makes it easy to edit media within your presentation. To place an image or .MOV video, just drag and drop the file into your slide. Always select the image you want to edit and have your “Inspector” panel open; the “Inspector” will affect whatever image you have selected.
You can add a line border or picture frame using the “Graphics Inspector” section of the “Inspector” panel. You can also select a drop shadow or reflection to give the presentation some dimension.
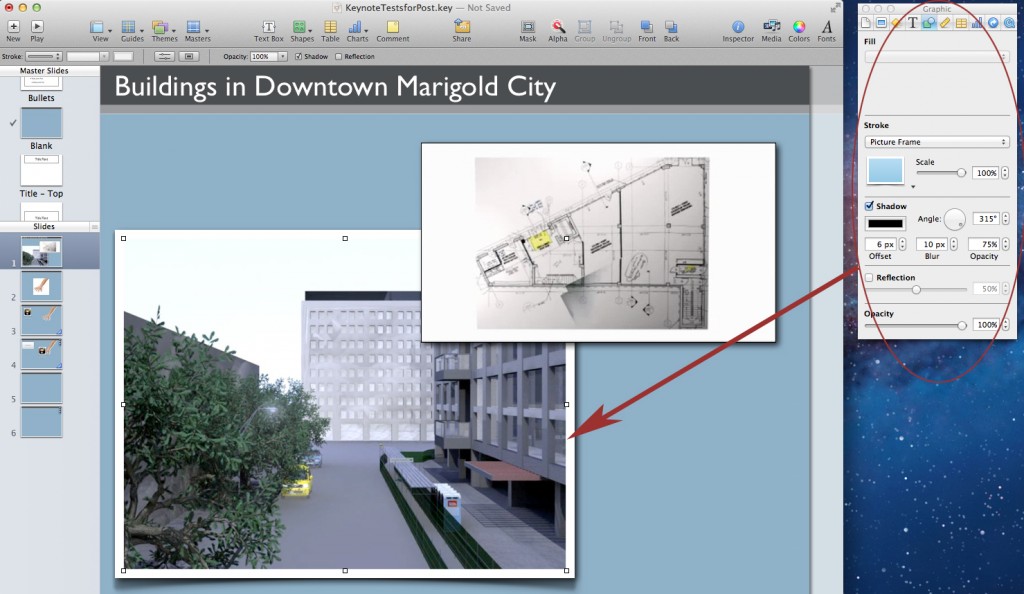
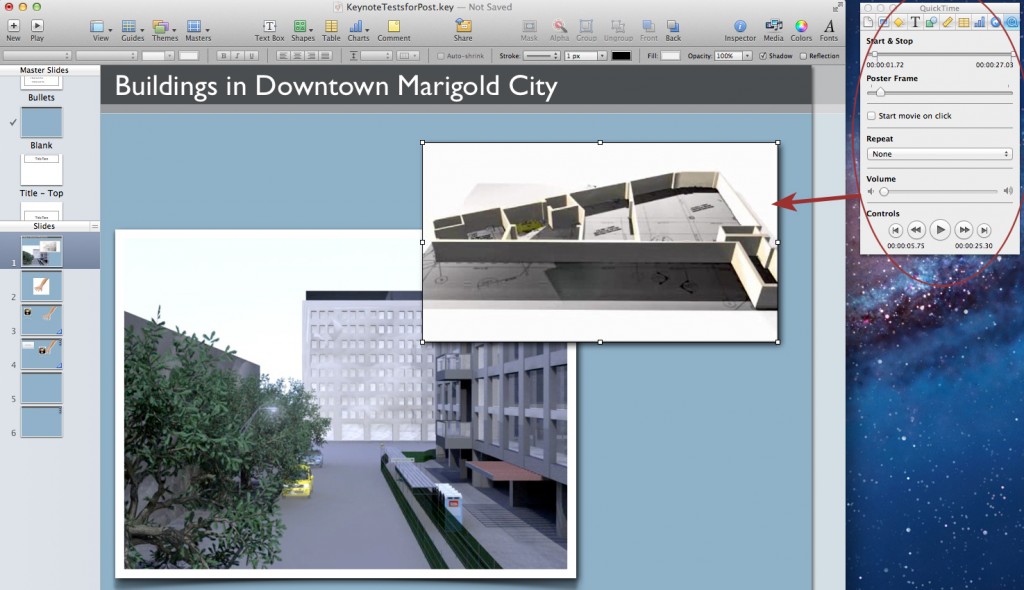
This section also lets you change the opacity of the image or video. To change the size and placement of the image or video, you can use the handles and manipulate it manually. Or, to keep your dimensions exact, punch numbers into the “Metrics Inspector” (ruler icon). For video, you can set start and stop times, choose a poster frame, and adjust the volume using the “QuickTime Inspector” (Q icon).
Instant Alpha
This is a fun and useful tool. When you drag in a JPEG of, say, a person with a white background, Keynote makes it easy to cleanly delete the background. Just click the “Alpha” icon in the top formatting palette (red dot with a pen). A dialog box will instruct you to drag your cursor over the colors you want deleted—in this case, drag over a section of white.
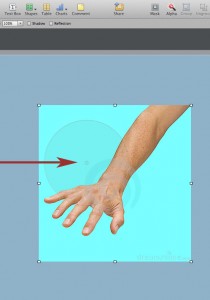
Then the background disappears, leaving the person image crisp. PNGs with white backgrounds tend to show up transparent in Keynote. This can be convenient if you planned to delete the background anyway, but if you want it there, try saving as a JPEG instead.
Transitions, Magic Move
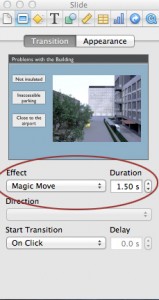
The “Slide Inspector” (blue square icon) lets you add cinematic transitions to your slides. A simple fade between two different slides looks really nice. But you can also use transitions to make a simple animation. If you want to move a text box from the left to front and center in the following slide, use the Magic Move transition. To do this, just duplicate your first slide (Control-click and select duplicate). In that second copied slide, move the text box to your desired final placement.
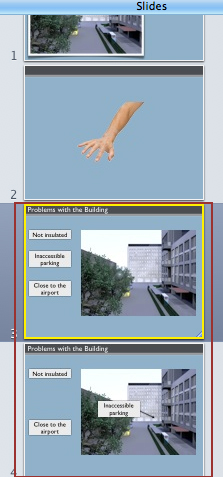
You can also change the opacity of the other images and text for greater effect. When you play the slides, the text box will smoothly transition from its position in Slide 1 to its position in Slide 2.
Custom Move
This technique allows you to animate a graphic within a slide instead of using a transition. With your graphic selected, go into the “Build Inspector” (yellow diamond icon) and select “Action.” Then select “Move” from the effects dropdown.
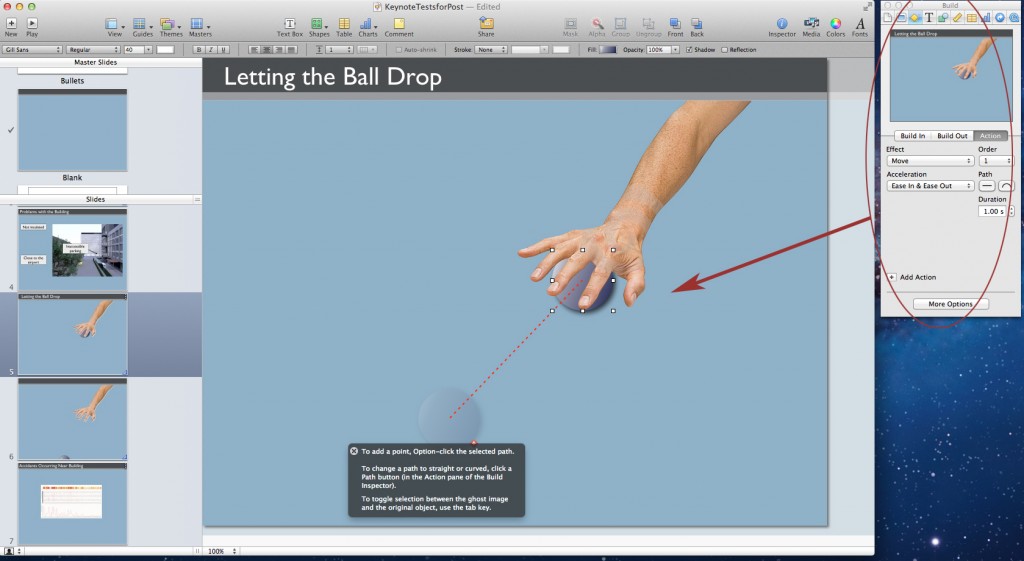
Click “More Options” and select “Start Automatically After Transition”—that way the animation will play on its own. You’ll see a red line and ghost image appear on the graphic. That’s the graphic’s path, and you can manipulate it by selecting one end of the line and moving it. Preview the animation by clicking inside the Preview window of the “Build Inspector.”
Smart Build
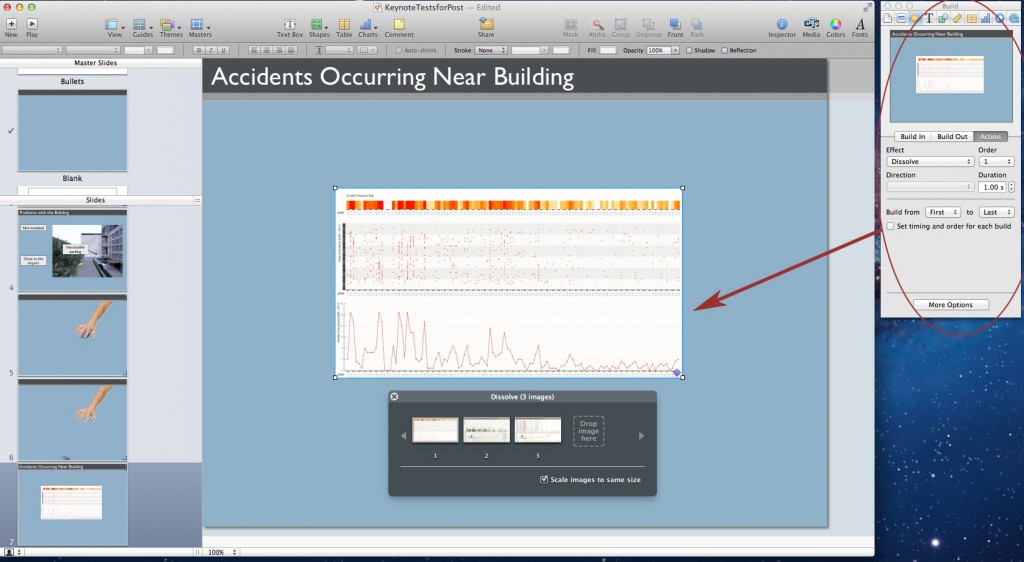
The “Smart Build” creates a slide show of multiple images on a single slide. To create one, go to Insert > Smart Build > Dissolve in the main menu bar. A dotted box will appear with a row of small boxes below. You can drag and drop images into the main box and use the small boxes below to edit the order in which they appear. You can edit other properties of the slide show in the “Build Inspector,” such as the speed of the dissolve and whether or not it starts automatically.
Keynote has many appealing pre-made templates, but if you’d like to use an original slide layout, use a master slide. First, choose your slide size. Open the “Inspector” panel and click the “Document Inspector” (page icon). You can select a suggested size based on pixel dimensions (800 x 600, 1024 x 768, etc.) or choose custom slide size. If you have already created a slide layout in another program, match your slide size to that. If you made your background color bars in Illustrator, simply select the shapes and hit command-C. Then open the master slides by going to the “View” menu and clicking “Show Master Slides.” Select the blank slide and hit command-V to paste the Illustrator shapes into the slide.
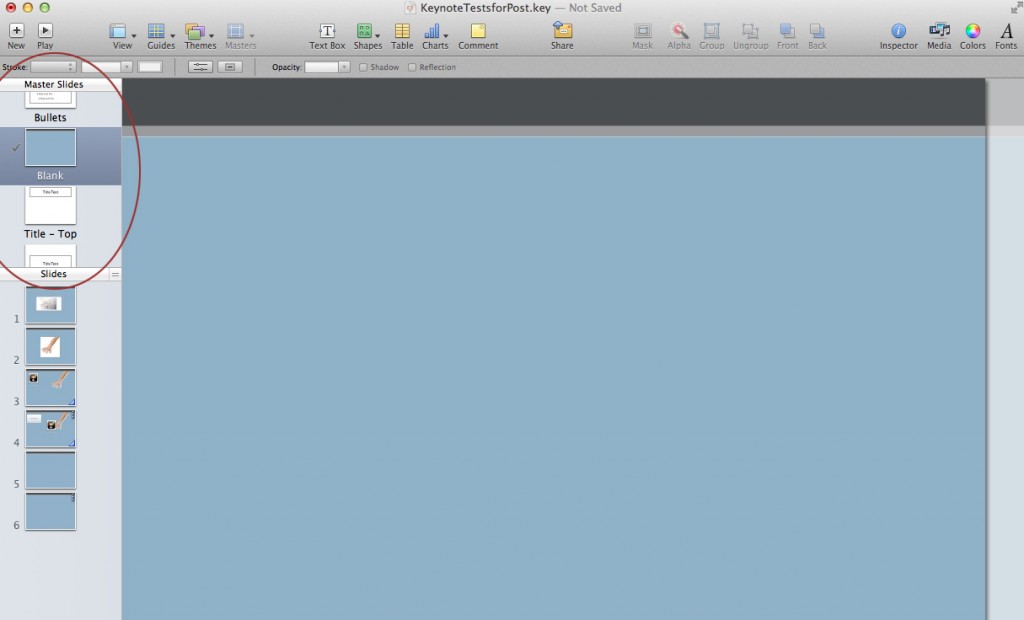
The images will come in as a single PDF that appears in the “Inspector” panel. You can also create shapes in the master slide within Keynote. Just click the shape icon in the menu just above your workspace. Choose the rectangle and create your background and header shapes. Change colors and outlines using the “Graphics Inspector” (shapes icon) in the “Inspector” panel.

