 Over the last 10 years, there’s been a significant shift in the way mediations are conducted. When I first started in the field, mediation briefs would come in via fax the night before the mediation. The mediator would begin the case with a joint conference where each side would make an opening statement, similar to trial, and after these openings the mediator would often have to spend the rest of the afternoon defusing the tension created by a joint conference.
There are two important aspects of developing presentations for mediation: (1) Communicate with the mediator before the mediation; and (2) develop a presentation that will inform but not inflame the opposing party. Remember that mediation is voluntary, and the goal is not to make the other side walk out. The goal is to get the case settled in the best way for your client.
In this blog post, I’ll cover several strategies to best present your case at mediation, including dos and don’ts for using graphics and technology to enhance your results.
It Starts with Your Brief
Nowadays, mediators need briefs at least a week in advance. Many mediators now schedule conference calls with the parties after reviewing the briefs to ask questions and solicit settlement ideas. This is also a good time to discuss any presentation ideas with the mediator.
Most mediators prefer that the parties exchange briefs, since it allows the other side to know where you are coming from. Good graphics—not copied photos or handwritten charts—can be a powerful addition to your brief. Seeing professional graphics and animations can let the other side know how prepared you are for mediation and trial.
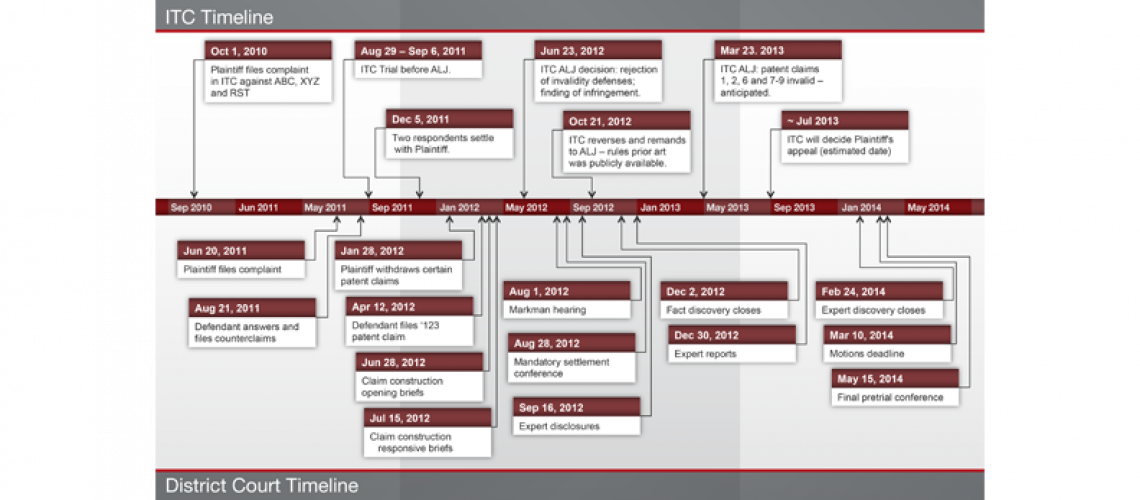
Mediators often hear a different case everyday; you, on the other hand, have dealt with the same case for the last several years. To help the mediator understand the key facts in your case, consider including charts, chronologies and accident reconstruction scenes in your brief.
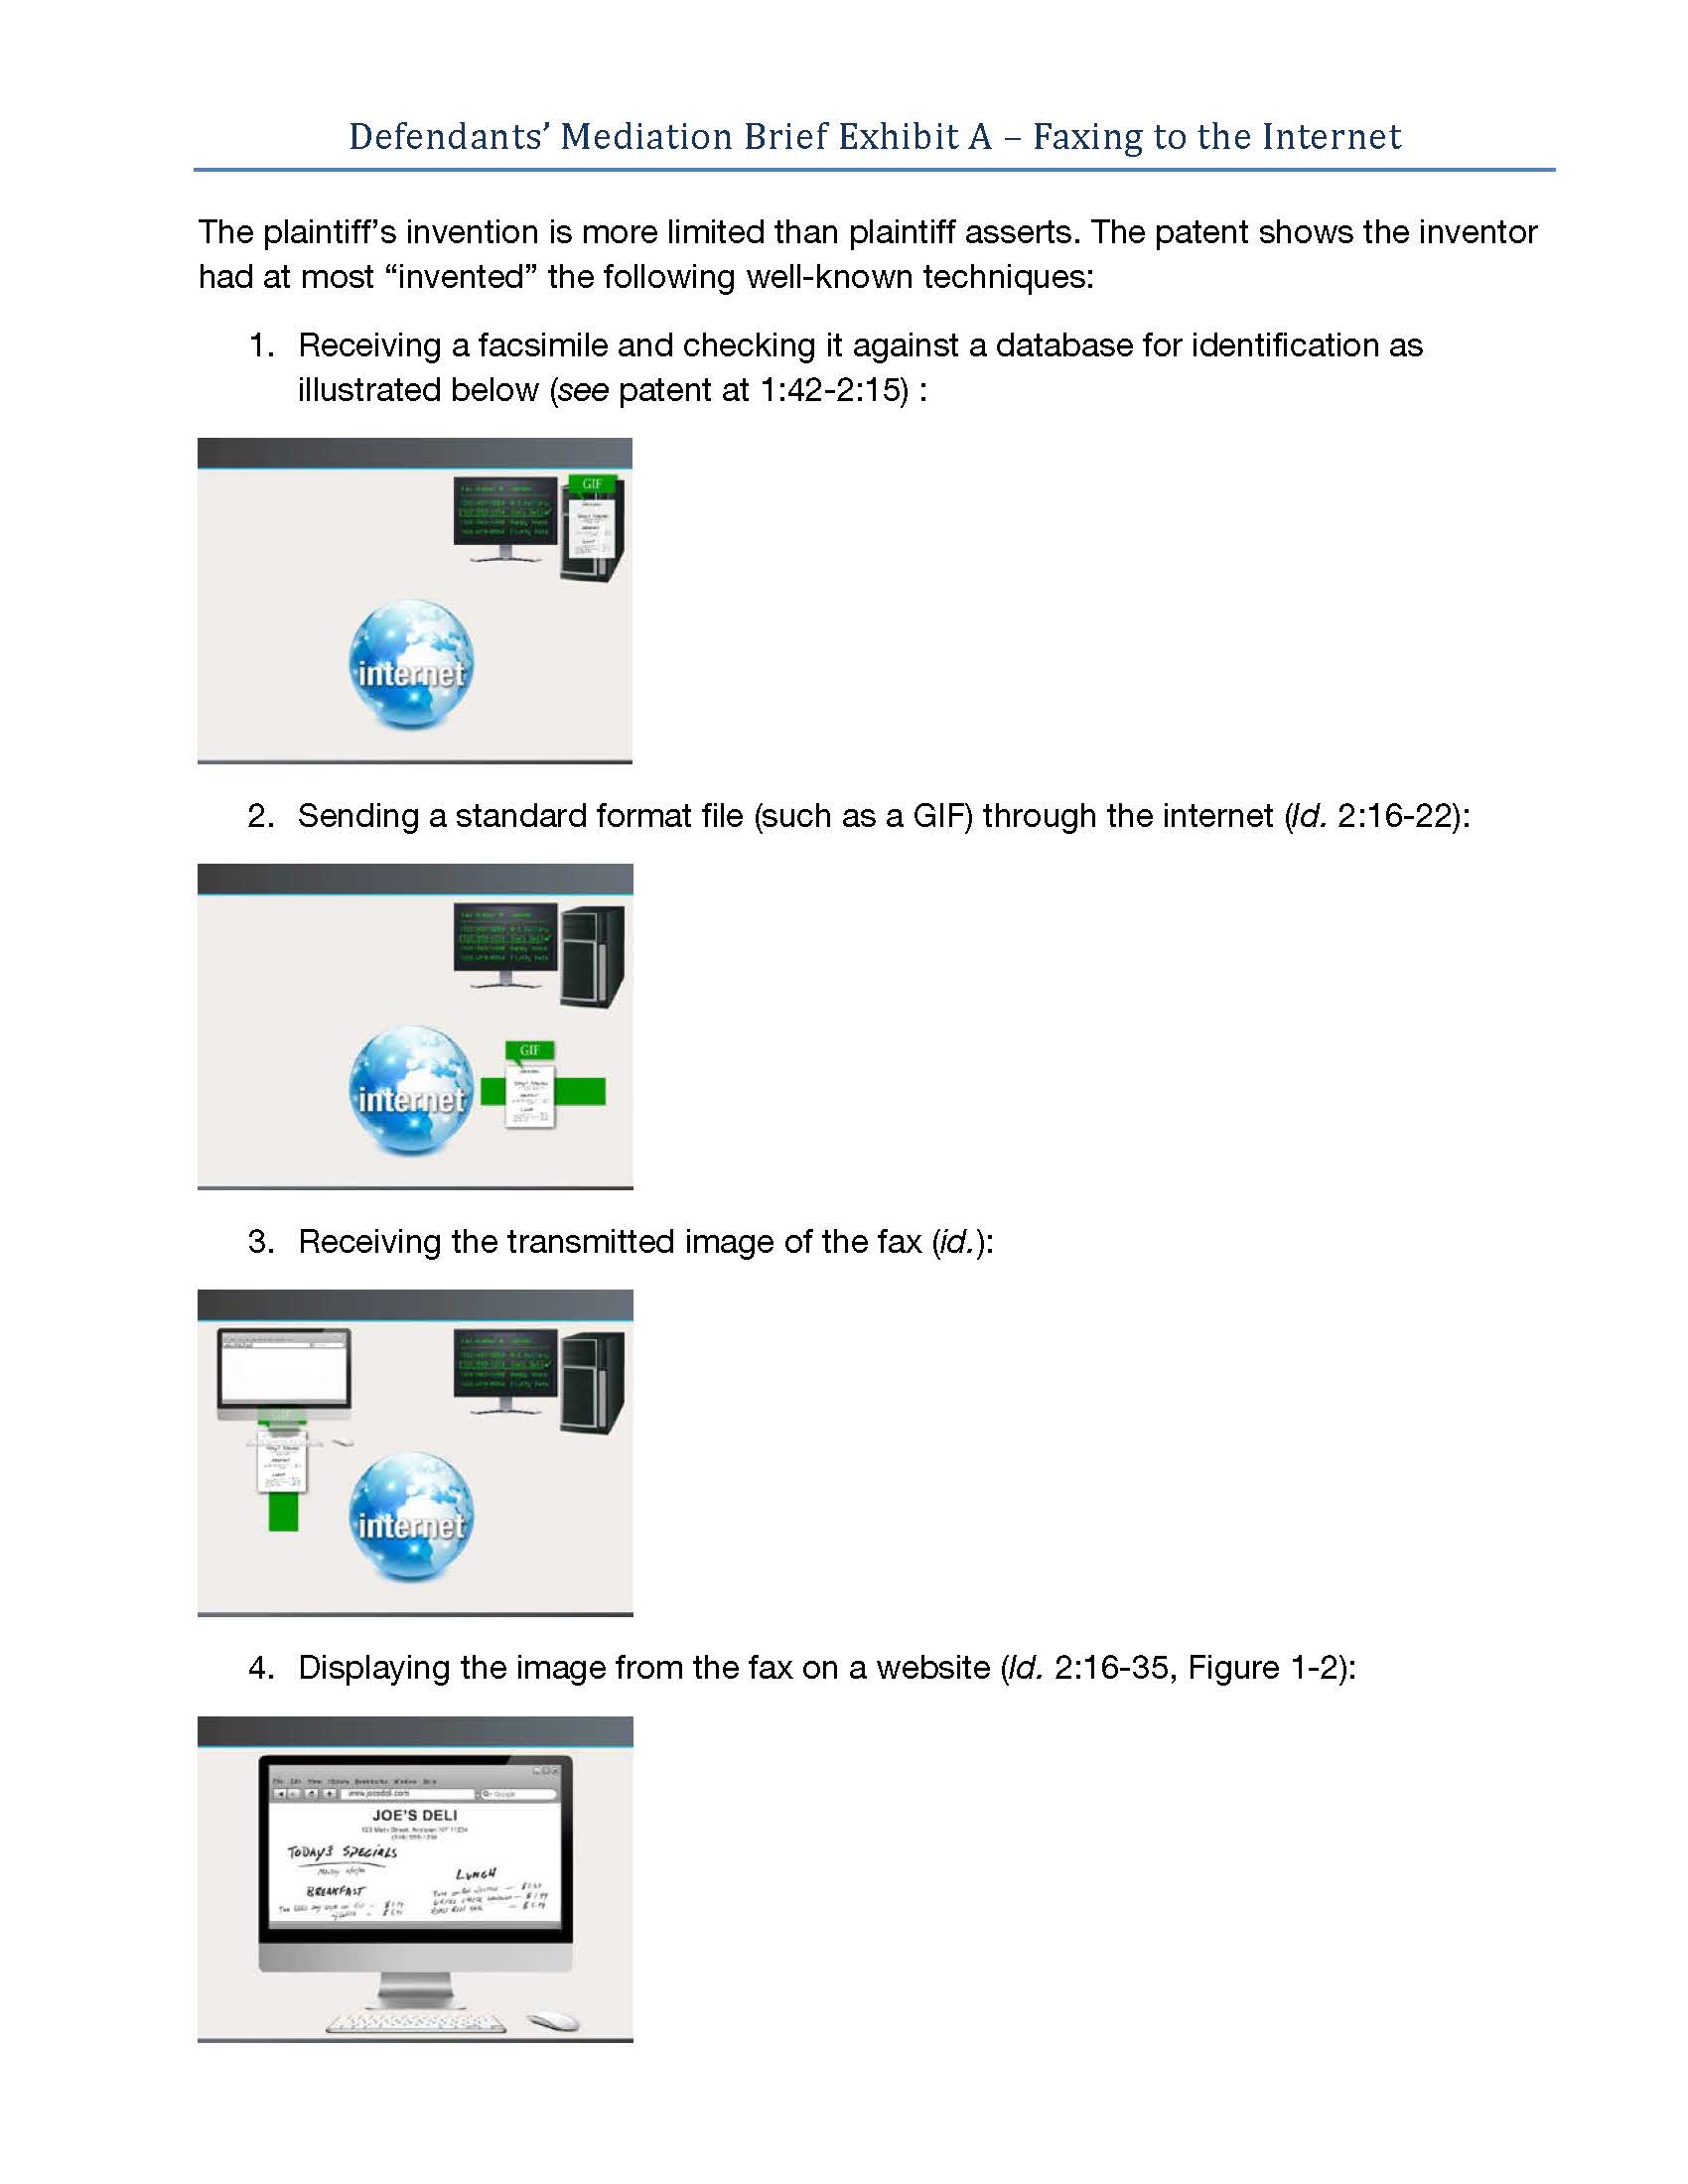
For example, the sample below shows screen shots from an animation which have been incorporated with text into a mediation brief to help a judge understand how limited the invention of an asserted patent is.

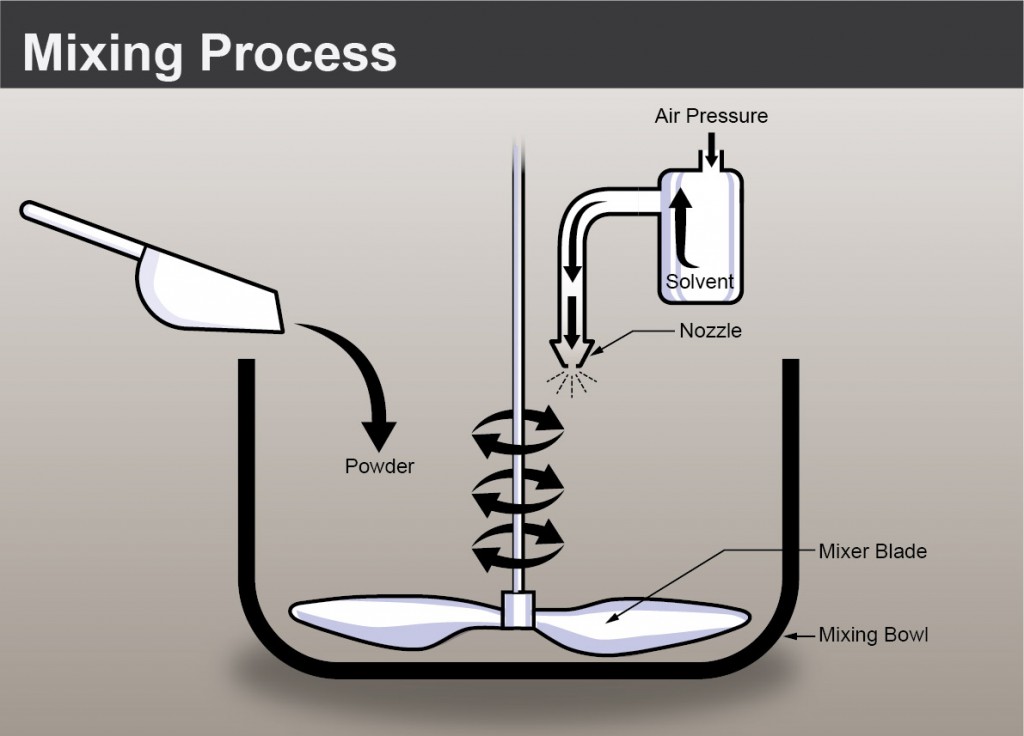
Or, for example, consider this graphic below, which illustrates a mixing process. Simple illustrations such as this can be embedded in the brief and make complex processes easier to understand.

When you are in the process of setting the case, speak with the mediator’s Case Manager about the use of electronic briefs, thumb drives, etc., and the proper settings for submitting them. Asking these questions beforehand can save a lot of time, energy and expense.
Another important aspect of mediation is that sometimes, it’s not about the merits of the case. In mediation, it’s about subtle factors such as financial needs or closure. If you want to communicate this to the mediator and not to opposing counsel, consider preparing two briefs: one brief for the mediator and opposing counsel; and a second confidential brief for the mediator. Submitting confidential briefs can give the mediator more information about the relationships, key sticking points, etc.
Ex Parte Communication with the Mediator is a Good Thing
If you have a visual presentation you want the other side to see, discuss it with the mediator prior to the mediation. Nobody likes surprises, and if the mediator doesn’t know or hasn’t seen the presentation, they will likely say it’s not a good idea. This is where you have to trust the mediator’s guidance of when to do a presentation. Most mediators don’t like opening with presentations, but that doesn’t mean you can’t use the presentation later on. Often mediators like to use presentations later in the day once a breakthrough has been made. For example, in a personal injury case, once the liability has been established, mediators will sometimes let a party show a “day in the life” video so that the other side can see the human element.
Tailor the Presentation to Persuade Opposing Counsel and Key Decision-Makers
If you are putting together a presentation for mediation, remember the mediator is not the decider. They are a facilitator, and as such they are looking for helpful information to convince the opposing party that your case is strong. Some presentations are prepared in the nature of a closing argument to a jury, and they have the effect of infuriating the other side that has to sit and listen to a one-sided case. This is where speaking with the mediator in advance can provide you with some direction on how to present your case to the opposing party.
The overriding idea for mediation is to use the facts and evidence of the case to argue for you. Your most powerful persuasive force is mastering and showing the facts and evidence that will support your claims in a non-argumentative manner. This is the kind of mediation presentation that leaves the other side with a pit in their stomach knowing that you can put this case together and win.
For example, it could be helpful in a large construction case to put together a PowerPoint on key sub-contractor responsibilities, visually comparing all the contracts and other evidence and showing the various scopes of work on diagrams as they are discussed. If the mediator is dealing with twenty different subs, then having a presentation on who did what could be beneficial to the mediator.
Will the key company representatives with decision-making authority be at the mediation? If so, that is who you want to present to. For the last two to three years, the opposing counsel has been telling the company representatives how strong their case is, and this is your first opportunity to interact with those individuals. For example, in accident cases, if you were to present your theory on causation through the use of visuals, that might get the company representatives to re-think their case.
Finally, consider having a version of your presentation that you can give to the opposing counsel (protected by the mediation privilege of course) who can share it with other decision-makers who may not have been in attendance at the mediation. Having a “leave-behind” interactive PDF that allows easy access to your key evidence, with well-designed demonstratives, is a way to get authority up the line from those not present.
Organize Your Files Digitally and Prepare a Settlement Document in Advance
Having a computer at mediation with all the critical documents, timelines, etc. is critically important. I’ve seen attorneys in the hallway furiously trying to get key documents faxed over at the last minute. Why not put those documents in an electronic format? For example, what if there was a key deposition that was taken? Sure, you can bring the transcript, but why not have the video on your computer? An important part of the mediation process is the chance to size up the opposing party; you will make an impression of being more credible and better prepared if you have everything well organized and at your fingertips on your laptop or tablet.
Also, take the time to draft a settlement document in advance of the mediation. There is nothing worse than getting a settlement at 4 p.m. and then spending the next two hours putting together a settlement document. Everyone is tired, hungry and wants to go home. Attorneys who have prepared a document in advance have an advantage. Key terms and ideas are already there, and it decreases the chances of missing an important element of the settlement agreement.
I recommend Morgan Smith’s past post on Technology for Mediation for additional information on this topic. I’m happy to meet with attorneys one-on-one or in a group presentation to demonstrate in greater detail the graphics, apps and other resources that give attorneys an edge and are becoming more the norm than the exception in mediation. Please email me if you’re interested.
Follow-up post: Best Strategies to Present Your Case in Arbitration.
Derek Ryan, director of business development at Cogent Legal, is the former General Manager at JAMS San Francisco and Business Manager for JAMS Silicon Valley.
If you’d like to receive updates from this blog, please click to subscribe by email.


